Have I ever told you that I love to refinish old furniture? I sure don't do it that often anymore, but I used to drag home all sorts of weird pieces when I was in high school and then paint them and put them in my room. One dreamy year, my family had a three car garage and we didn't park a single car in it, so I considered that my personal workshop. I brought home a lot of furniture that year.
So when the chance came and we needed another dresser but did not want to spend much money on it, I knew that I could put my old skills to use once again. Steve and I picked up this dresser from Bargain House for $95. We weren't crazy about the stain color. Or the weird decorative strip of wood between drawers two and three. Or the whole general look of it.
But we were crazy about the price and in a time crunch, so we squished it in our trunk and brought it home.
To be clear, only half of it fit in the trunk. The other half hung out of the back of the car and made me very nervous the whole drive home.
Next, Star and I picked up some milk paint from Great Walls Supply for $22. I chose Miss Mustard Seed's milk paint in Mustard Seed Yellow. Milk paint is a very old type of paint that is actually a powdered pigment that you mix with water. The staff at Great Walls were very helpful and gave us lots of tips for mixing and applying the paint. I also brought home a bottle of hemp oil ($12) and a half bottle of bonding agent (free- they were out, so they gave me half a bottle that they were using at the store). The hemp oil is like a top coat that you rub on after you paint the piece. The bonding agent gets mixed in with the first coat of paint to help it adhere to whatever you're painting on- in my case, previously finished wood.
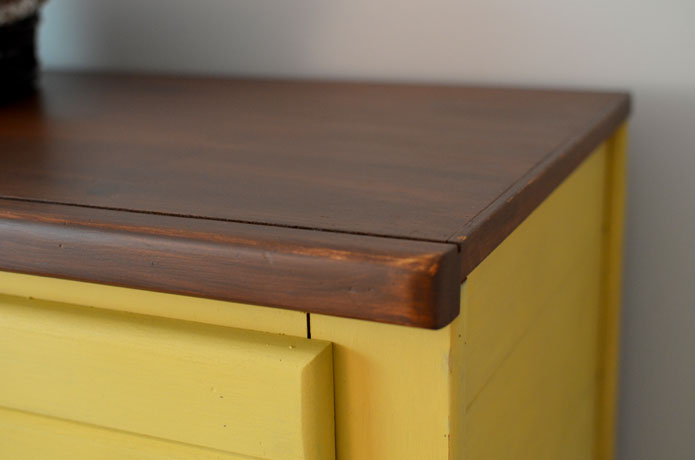
After searching Pinterest for some inspiration, I felt ready to begin. I started by gently sanding the top of the dresser. Then I found an almost empty can of stain in the garage and painted it on pretty thick. I didn't worry too much about it looking gloppy because I knew I could sand the glops later.
Before I started painting, I pried the strange wooden beam off the middle of the dresser and patched the holes.
I mixed up my first coat of paint with the bonding agent and started painting the rest of the dresser and drawers. With milk paint, you don't have to pre-sand anything, which is awesome. The easiest way I found to mix the paint is by putting the powder and warm water in a glass jar and shaking it for a few minutes. Then you want to let it sit for a few minutes to settle. Then stir in the bonding agent last and start painting.
Milk paint, in my experience, can look pretty terrible going on. The first coat was quite streaky and not at all pretty. The second coat (without bonding agent) got better. I think I also got better and mixing the correct ratio of powder and water with each coat.
After I was done painting all the yellow, I decided I wanted a design in the bare spot left between drawers two and three. Keep in mind that I was determined to: a) only use supplies I had on hand, and b) spend as little time as possible. I marked some dots with a ruler and taped off a grid of diamonds with masking tape. Then I took some white craft paint and gently brushed it on. It was more like dry brushing than painting, so I didn't really have to wait for it to dry. I took the tape off and then lightly sanded over my diamonds to make them blend into the rest of the piece better.
Once I felt happy with the paint, I went back and sanded any drips or weird spots. After I was done sanding, I rubbed two coats of hemp oil into the whole thing (top included) to give it a nice shine. The hemp oil soaks in, so it's not very shiny, but it gives the piece a smoother look and feel that I like. Also it helps protect the paint.
The last thing to take care of were the knobs. I found a pack of 10 rubbed bronze knobs at Target for $17.99 that were almost exactly what I was looking for. The screws that came with them were way too short, but thankfully I'd saved the old screws, which were a little too long, but thankfully Steve had some washers that we added and then they fit just right. Whew.
My budget for this dresser, plus the bookshelves I'm working on this week, was $300 total. The dresser ended up costing $146.99, plus I had enough paint left over for the shelves. I'll share pictures of those next week once they're done!
My final thoughts on milk paint:
- it doesn't produce a very even finish, which can be good for used furniture- more forgiving
- getting the right ratio of powder to water takes a few tries and will vary based on what type of surface you are painting
- it is easy to clean up and doesn't have any fumes, which is really pleasant
Overall, I thought it was a great paint for this project and I would definitely use it again!


Absolutely love the dresser! What a bright and happy color to enhance any room!
ReplyDeleteI LOVE how the dresser turned out. I may have to try that milk paint out and get some tips from you. It looks great! My favorite color too! :)
ReplyDelete